
TMA waist coat – some ‘free’ sewing
I am still aiming to both fill my time and to use patterns that i already own; i unexpectedly found myself making The Maker’s Atelier (TMA) waist coat, which appeared in the Spring 20 TMA magazine.
Having made a new lampshade a couple of weeks ago, when i tried to install it, i uncovered an electrical problem which was waiting to happen. So, with much dancing around to avoid one another, a friend called in to fix the problem, and his wife presented me with loads of fabric that she had ‘in stock’. The fabric selected is a jacquard weave, almost certainly made from artificial fibres, because, when i ‘test’ washed it, it dried very quickly (and washed OK). I’ve been thinking about a waist coat for the up-coming season of sociability, so an unused pattern and free fabric that would be suitable brought the idea into being earlier than expected.
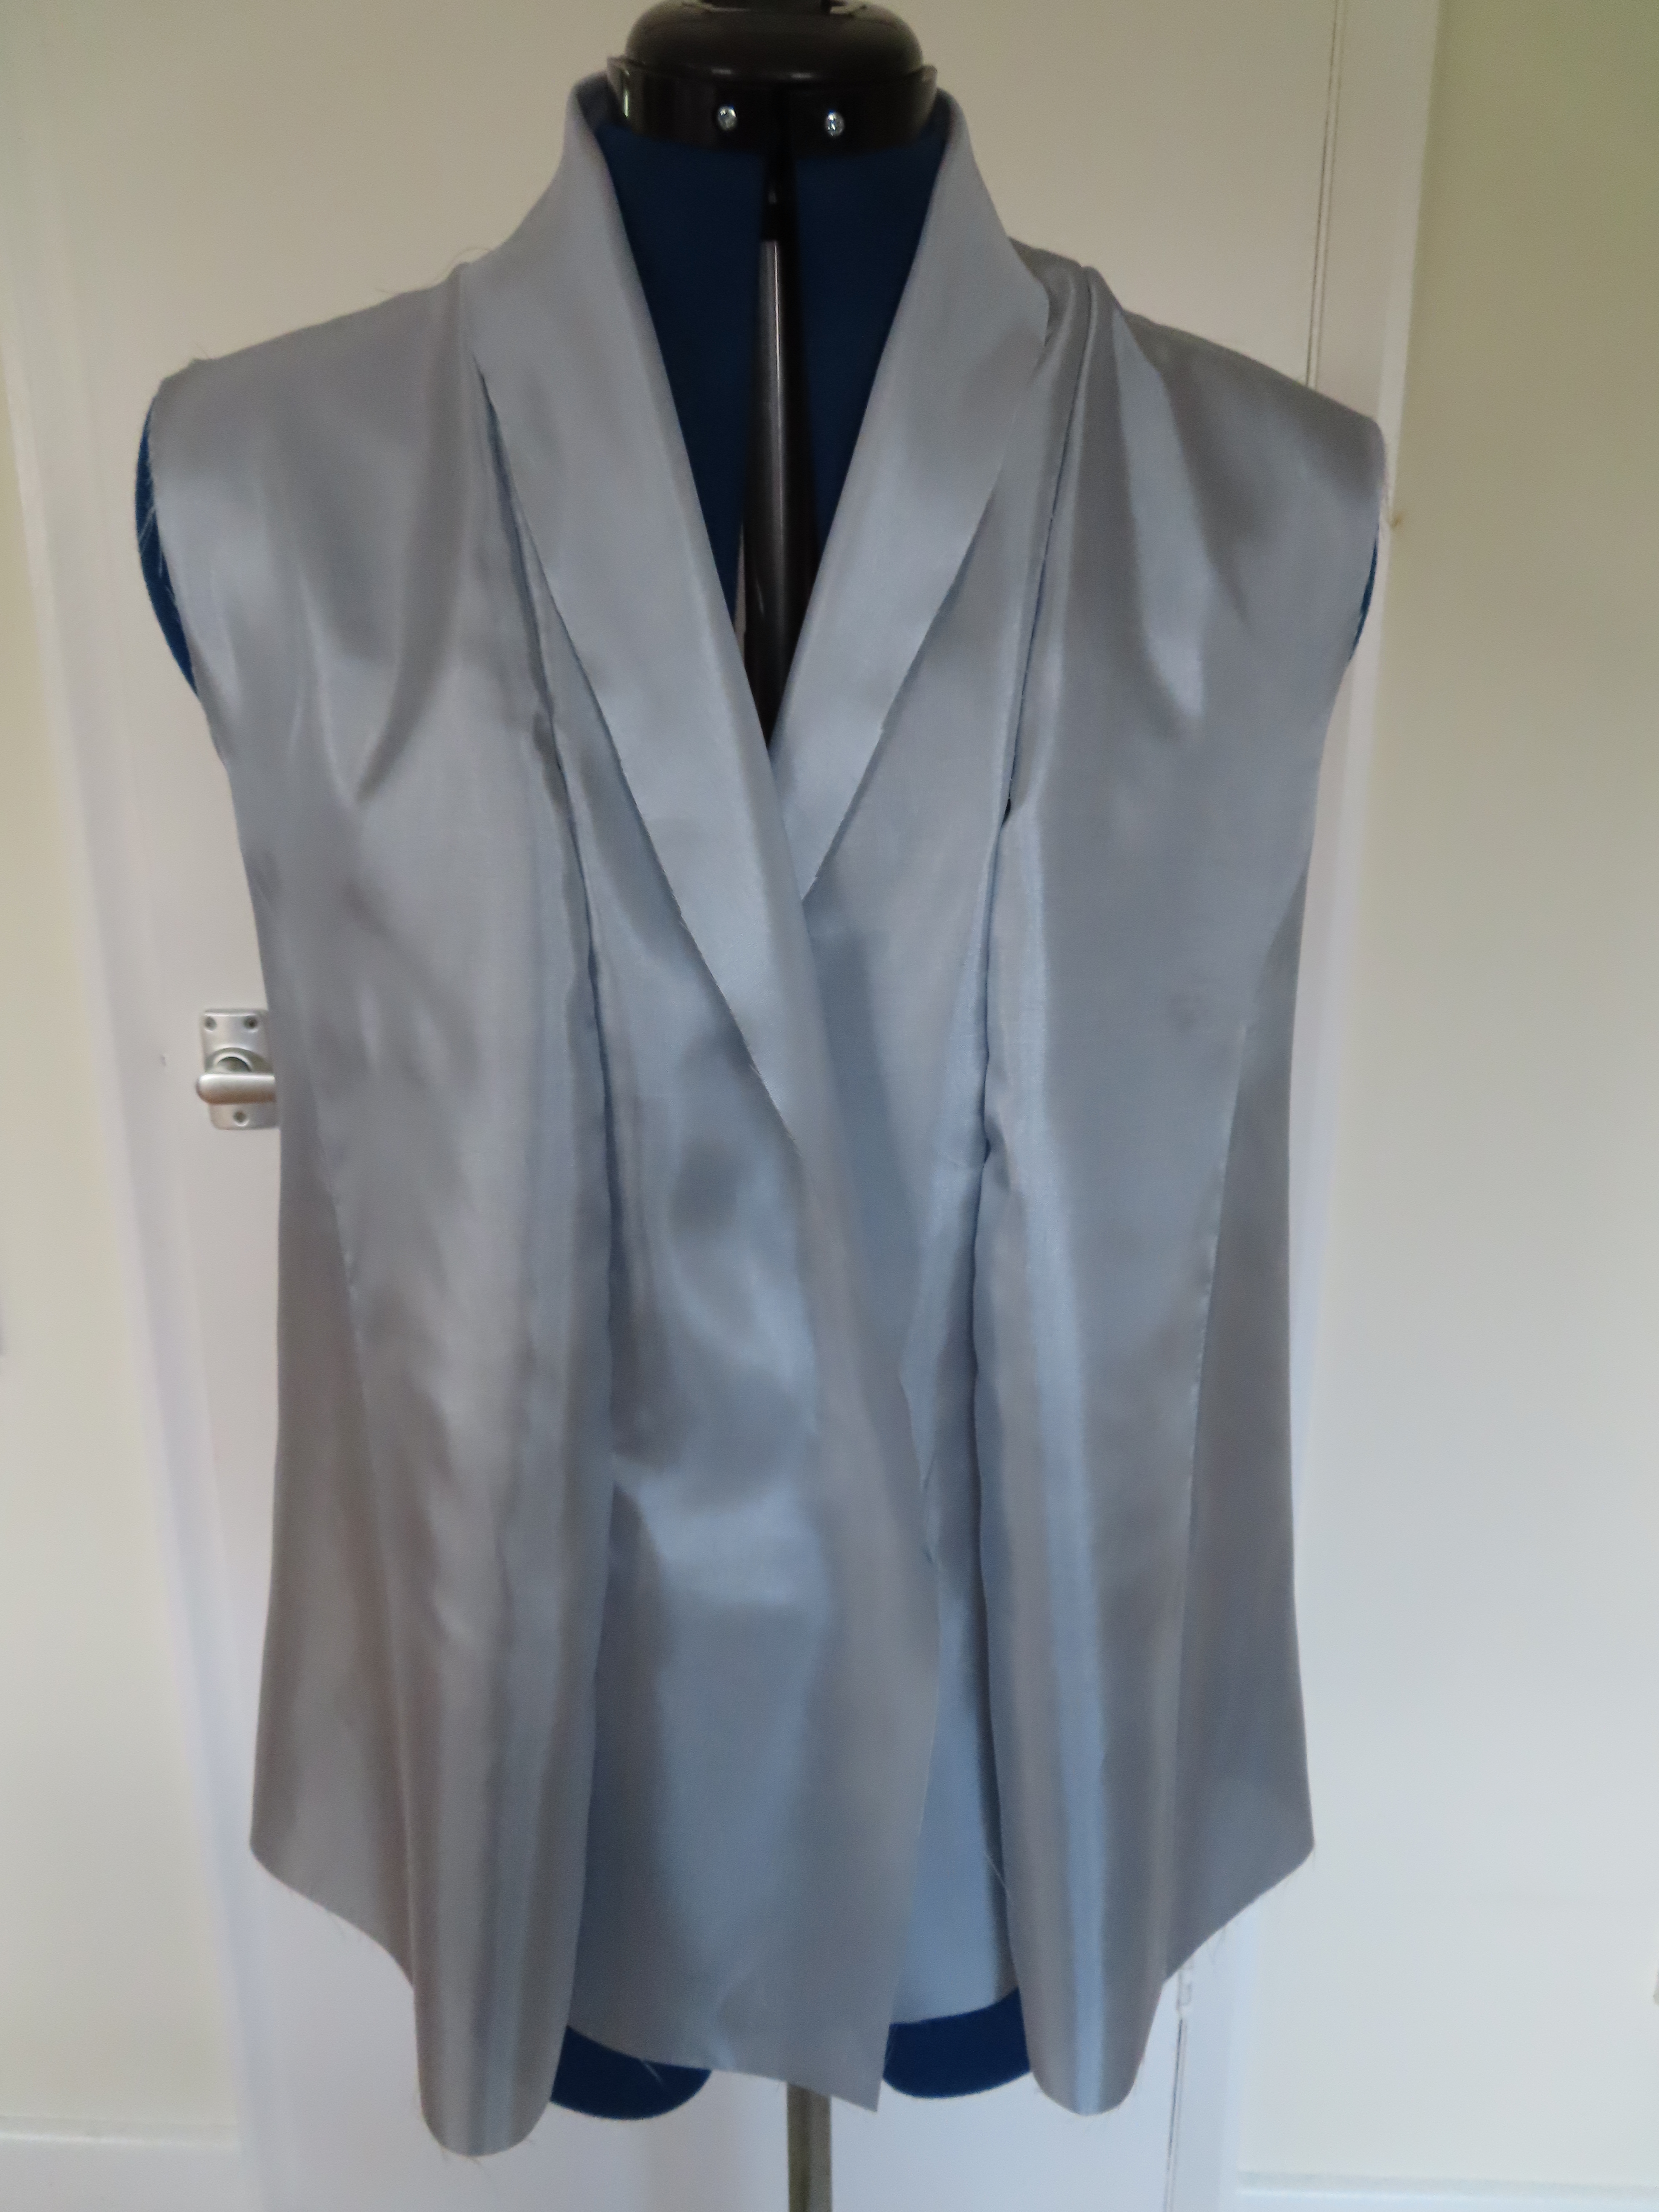
I made the lined version. Although i don’t generally have a stash of outer fabric, i do have a small stash of lining, so i dived into that.

It’s not an easy pattern. Typically of the Maker’s Atelier, there are a number of technical steps which give a neat finish, but can be difficult to get your head round what to do to achieve the neat finish.
After my recent sizing challenges, at least i have quite a lot of experience of TMA patterns, that i could use a basis for deciding what size to cut. TMA usually makes up with a lot of ease, and generally i have cut a size 16. So i cautiously did the same again. Do other sewists use the lining as a form of toile? I have done it a few times, and i knew i had enough lining to re-cut if necessary.
Maybe my brain is a bit dead from too little human interaction, but i found it quite hard to work out how to sew it together to mimic a size test of the final design, using the ‘real’ lining sections, and a front facing so that i had a genuine replica of the final size. It meant that i started at something like stage 4, and then had to revert to stage 2 to get the neckline method right. It took me ages to spot that!
And yet the next day i managed to get the ‘bagging out’ instruction for sewing the arm holes in less than 2 minutes. The same method is used for the sleeveless sundress, which, unusually, i have never blogged other than as part of Me Made May last year. I like this method. It is what i learned at school, although i don’t think i have seen another pattern company use the method since i left school. The result is very neat and satisfying.
Using a relatively stiff fabric, i also found the method of stitching the shoulder seams and across the back neck ‘in one’, to be difficult. I ended up hand stitching the right angle bend to get a flat finish. I’ve had to do that before…..

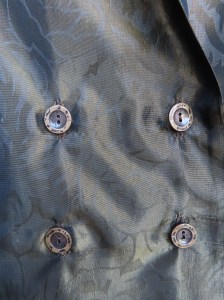
The ‘magic button box’ delivered again, although i did buy these online during lockdown 1.0, partly to give me a choice for the garment i was sewing, partly to justify the postage, and partly to add to my stock. So that was a good decision, as they work quite well on the waist coat! However, i don’t recall sewing anything double breasted before. It takes a bit of time to get it right. Not only does the vertical alignment need to be correct, but there is horizontal alignment to consider as well. I positioned the second row of buttons with the aid of a tape measure and the ironing board. The vintage buckle was bought at a sewing show ages ago; maybe Sewing Bee Live. I bought a few, and it is the first one that i have used. It slips easily when worn. I may need to add a small piece of velcro to keep it in place, or even a small stitch.


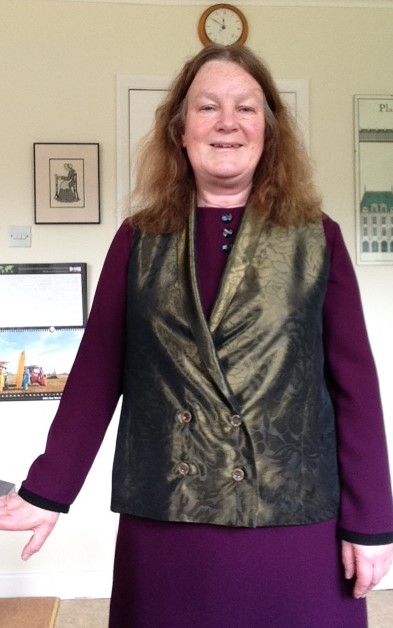

Now this waist coat isn’t going to go with everything. So i decided to have a bit of fun one morning, and see how it could be integrated into the rest of my wardrobe. The magazine pictures suggest that the waist coat could be worn as a stand alone summer top. I’d have to raise the buttons to make that work, or even add a hidden fastening inside the lower part of the collar. It gapes when i lean forwards. I probably wouldn’t wear all of these outfits as photographed, but it allowed me to see how the fit and colour worked with a number of garments.
This is also giving me an idea for this year’s Me Made May. Maybe i should try to concentrate on wearing the large number of garments that i have made since last March to ensure that they get some wear. Good plan!
One Week, One Pattern

Me Made May 2016

Me Made May 2015

Simplicity Competition

Sew Over it Patterns

