
School cardigan
Well, I used to wear cardigans like this for school….

This is the much respected Jenna Cardi from Muse patterns, which I have had my eye on for a while. In principle it’s a straight forward make, but there are some tricky sewing areas, and I would class my finished garment as only just wearable.
This blog entry is partly for your information, and partly to serve as ‘notes to self’ for the next one, and I shall do it in school style format!
- Its a PDF download from the States, which in itself is not a problem, but it took me a whole evening to work out how to turn off ‘page scaling’ as they call it, on my printer, to get the right sized pattern. I guess I haven’t printed a PDF pattern since I got my new printer. That’s an IT issue really, and outside of my scope of professional IT knowledge. I have noted how to do it in the detailed instructions.
- I find piecing the pages together to be quite a satisfying process, until I run out of table! That’s not too big a problem with this pattern, as it’s laid out in a way that minimises paper printing. What is a problem is what to do with all the pieced together pages. In other cases I have managed to fold them carefully and kept them for future use. These pages don’t fold easily. In the end I traced all of the printed pieces to tissue paper, including the ones that I didn’t need for this design, and I will throw away (re-cycle) the pages shortly. It is saved on my computer after all, and could be printed again.
- I’ve been back to Liverpool recently, so the fabric is from Abakhan. I think that for £4 a metre, the quality is pretty good.
- I made a size 42, as all but one of my measurement are close to that size. The sleeves are not close to that size. For my own future reference, here are the changes that I made this time, and could make for another version.
- Reduce the sleeve piece length by 7cm by shortening at the 3/4 length mark.
- Halved the length of the cuffs, which is another 7cm.
- I reserve a little bit of judgement on the next one until I see what I wear with the cardi and how much of a nuisance ‘flappy’ cuffs are, but there is potential scope to reduce the cuff and bottom sleeve width by up to 5cm. In principle, I could still do this, especially as I have a spare set of cuffs after cutting them in half!
- Increase the seam allowance on the set in sleeve from 1cm to 2cm so that the sleeve sits better on the shoulder.
- I note that the pattern does say that it is designed for someone who is 5’10”. Well, that is 6″ taller than I am, and i would say that the whole of that 6″ is in the sleeve rather than the body length! I am reasonably happy with the body length after no alterations.

- The pieces come together nicely, until that is, the overlocker pushes them apart at key points, mainly the top and bottom of the button band. This is what has made the cardi only just wearable. Certainly I’d be marked down if I was on Sewing Bee! Maybe I would machine stitch that seam with a (as yet unpurchased) walking foot next time. Likewise the top stitching on the button band could definitely have done with some help from a walking foot, although I have been able to largely ‘press out’ fabric ruffles this time round.

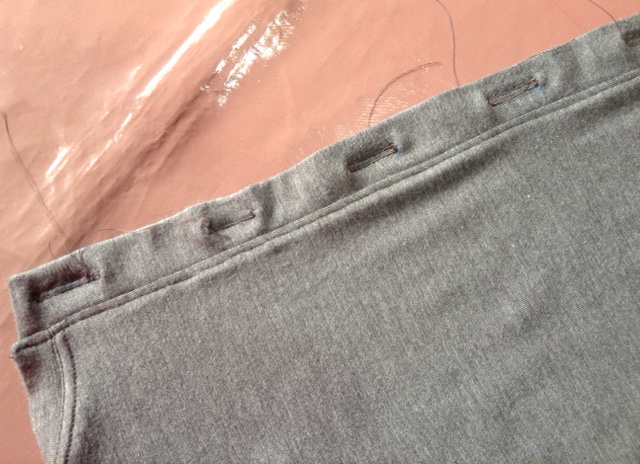
- Sometimes I love button holes and sometimes I hate them. There is potential for all sorts of trouble when sewing button holes on jersey, even if it is interfaced, and has been tested under pretty much the same circumstances (apart from the seams), and done good holes…….. This time I loved 7 of the button holes and really hated the first one I did – second from the left! In fact, I was almost ready to cut off the front facing and start over again as I tried to unpick the troublesome stitching, but I thought better of it and had a go at the other 7 to see what happened – and blow me – they all stitched fine! So then I had to return to the offending button hole and very carefully unpick all of the piled up stitching without creating a hole. I managed that, and then did exactly what I had just tried to do in the same place, and of course, it worked second time. Please explain! ( I recently noted someone’s advice to rub the back of a failed button hole with sandpaper and the stitches should start to come out more easily – I don’t recall where I read it, but thanks for the advice and I will try it next time….)
- My tried and tested method of lining up the buttons behind the holes didn’t work this time round – maybe because this is jersey. I had to line all of the buttons up at the same time whilst making sure that the top, bottom and hem band seams were all level. Except that I didn’t realise this until I had stitched on 3 buttons, and when I came to unpick the one that was in the wrong place, my unpicker broke!

So tomorrow I will be off to the shops to get a walking foot and a new unpicker, and here is the shopping that I did the next day!….

Indeed, I also went to Barry’s fabrics and bought some more light weight jersey fabric with a view to applying all of the lessons learnt above. This is the result,


showing evidence of the new foot in action with the twin needle. I wore this with my first Moneta all day as soon as it was finished.
2 comments on “School cardigan”
Leave a comment
One Week, One Pattern

Me Made May 2016

Me Made May 2015

Simplicity Competition

Sew Over it Patterns


Love these cardis. I’m definitely going to have to get this pattern to try out!
Hi there Emily. Yes, I recommend the pattern. Good luck. Look forward to seeing your makes.