
Machine Embroidery
Whilst i have previously used some of my machine’s decorative stitches, i haven’t set out to use machine embroidery ‘in anger’ before. I haven’t intended to say ‘Hey, look at these fancy stitches!’. So furthering my initiative to learn some new skills, and to re-use patterns, in my retirement / lockdown, i had a go at embroidering Simplicity 9149. This is also partly inspired by the Winter Maker’s Atelier magazine, where, at least for the time being, i decided not to buy her new patterns, as i already had something similar……

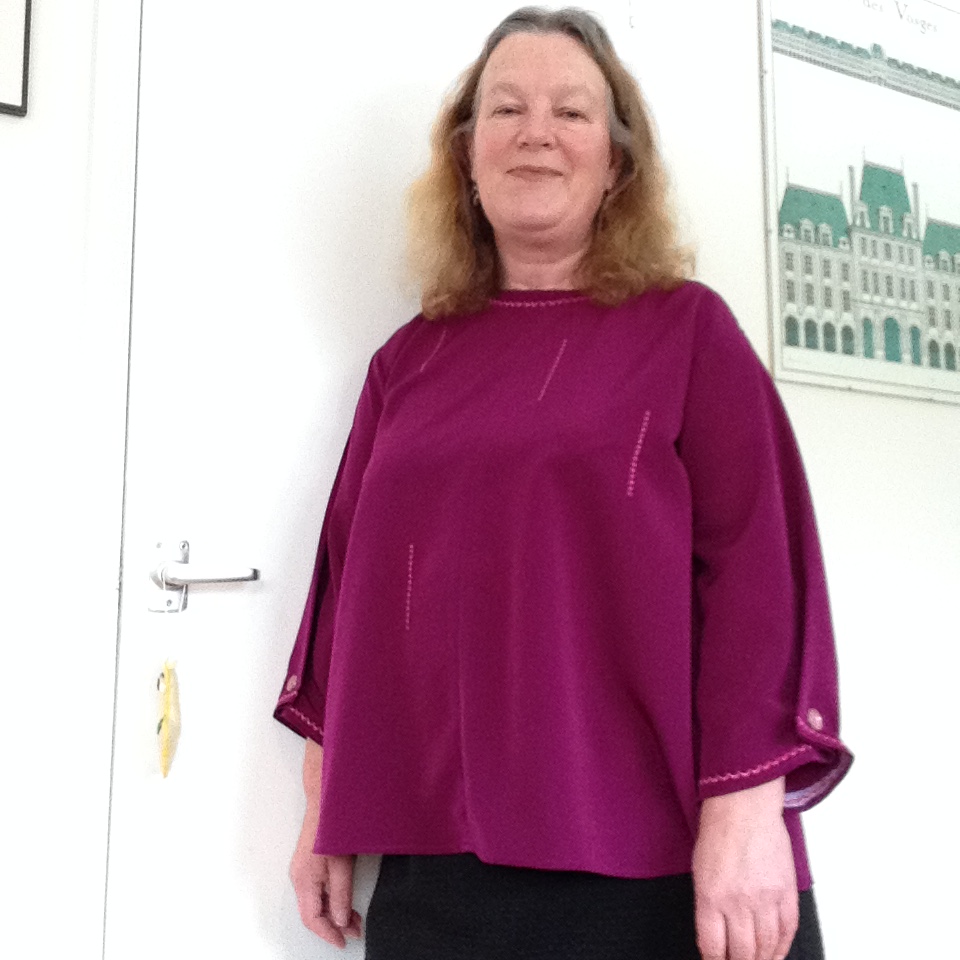
I purchased the fabric a few weeks ago, after the success of the TopKnot Romper make, which is in the same fabric, but a different colour. It is MinervaCrafts’ Trieste crepe, in a very fine weave. So fine that it needs to be stitched with a stretch needle, and hangs beautifully.
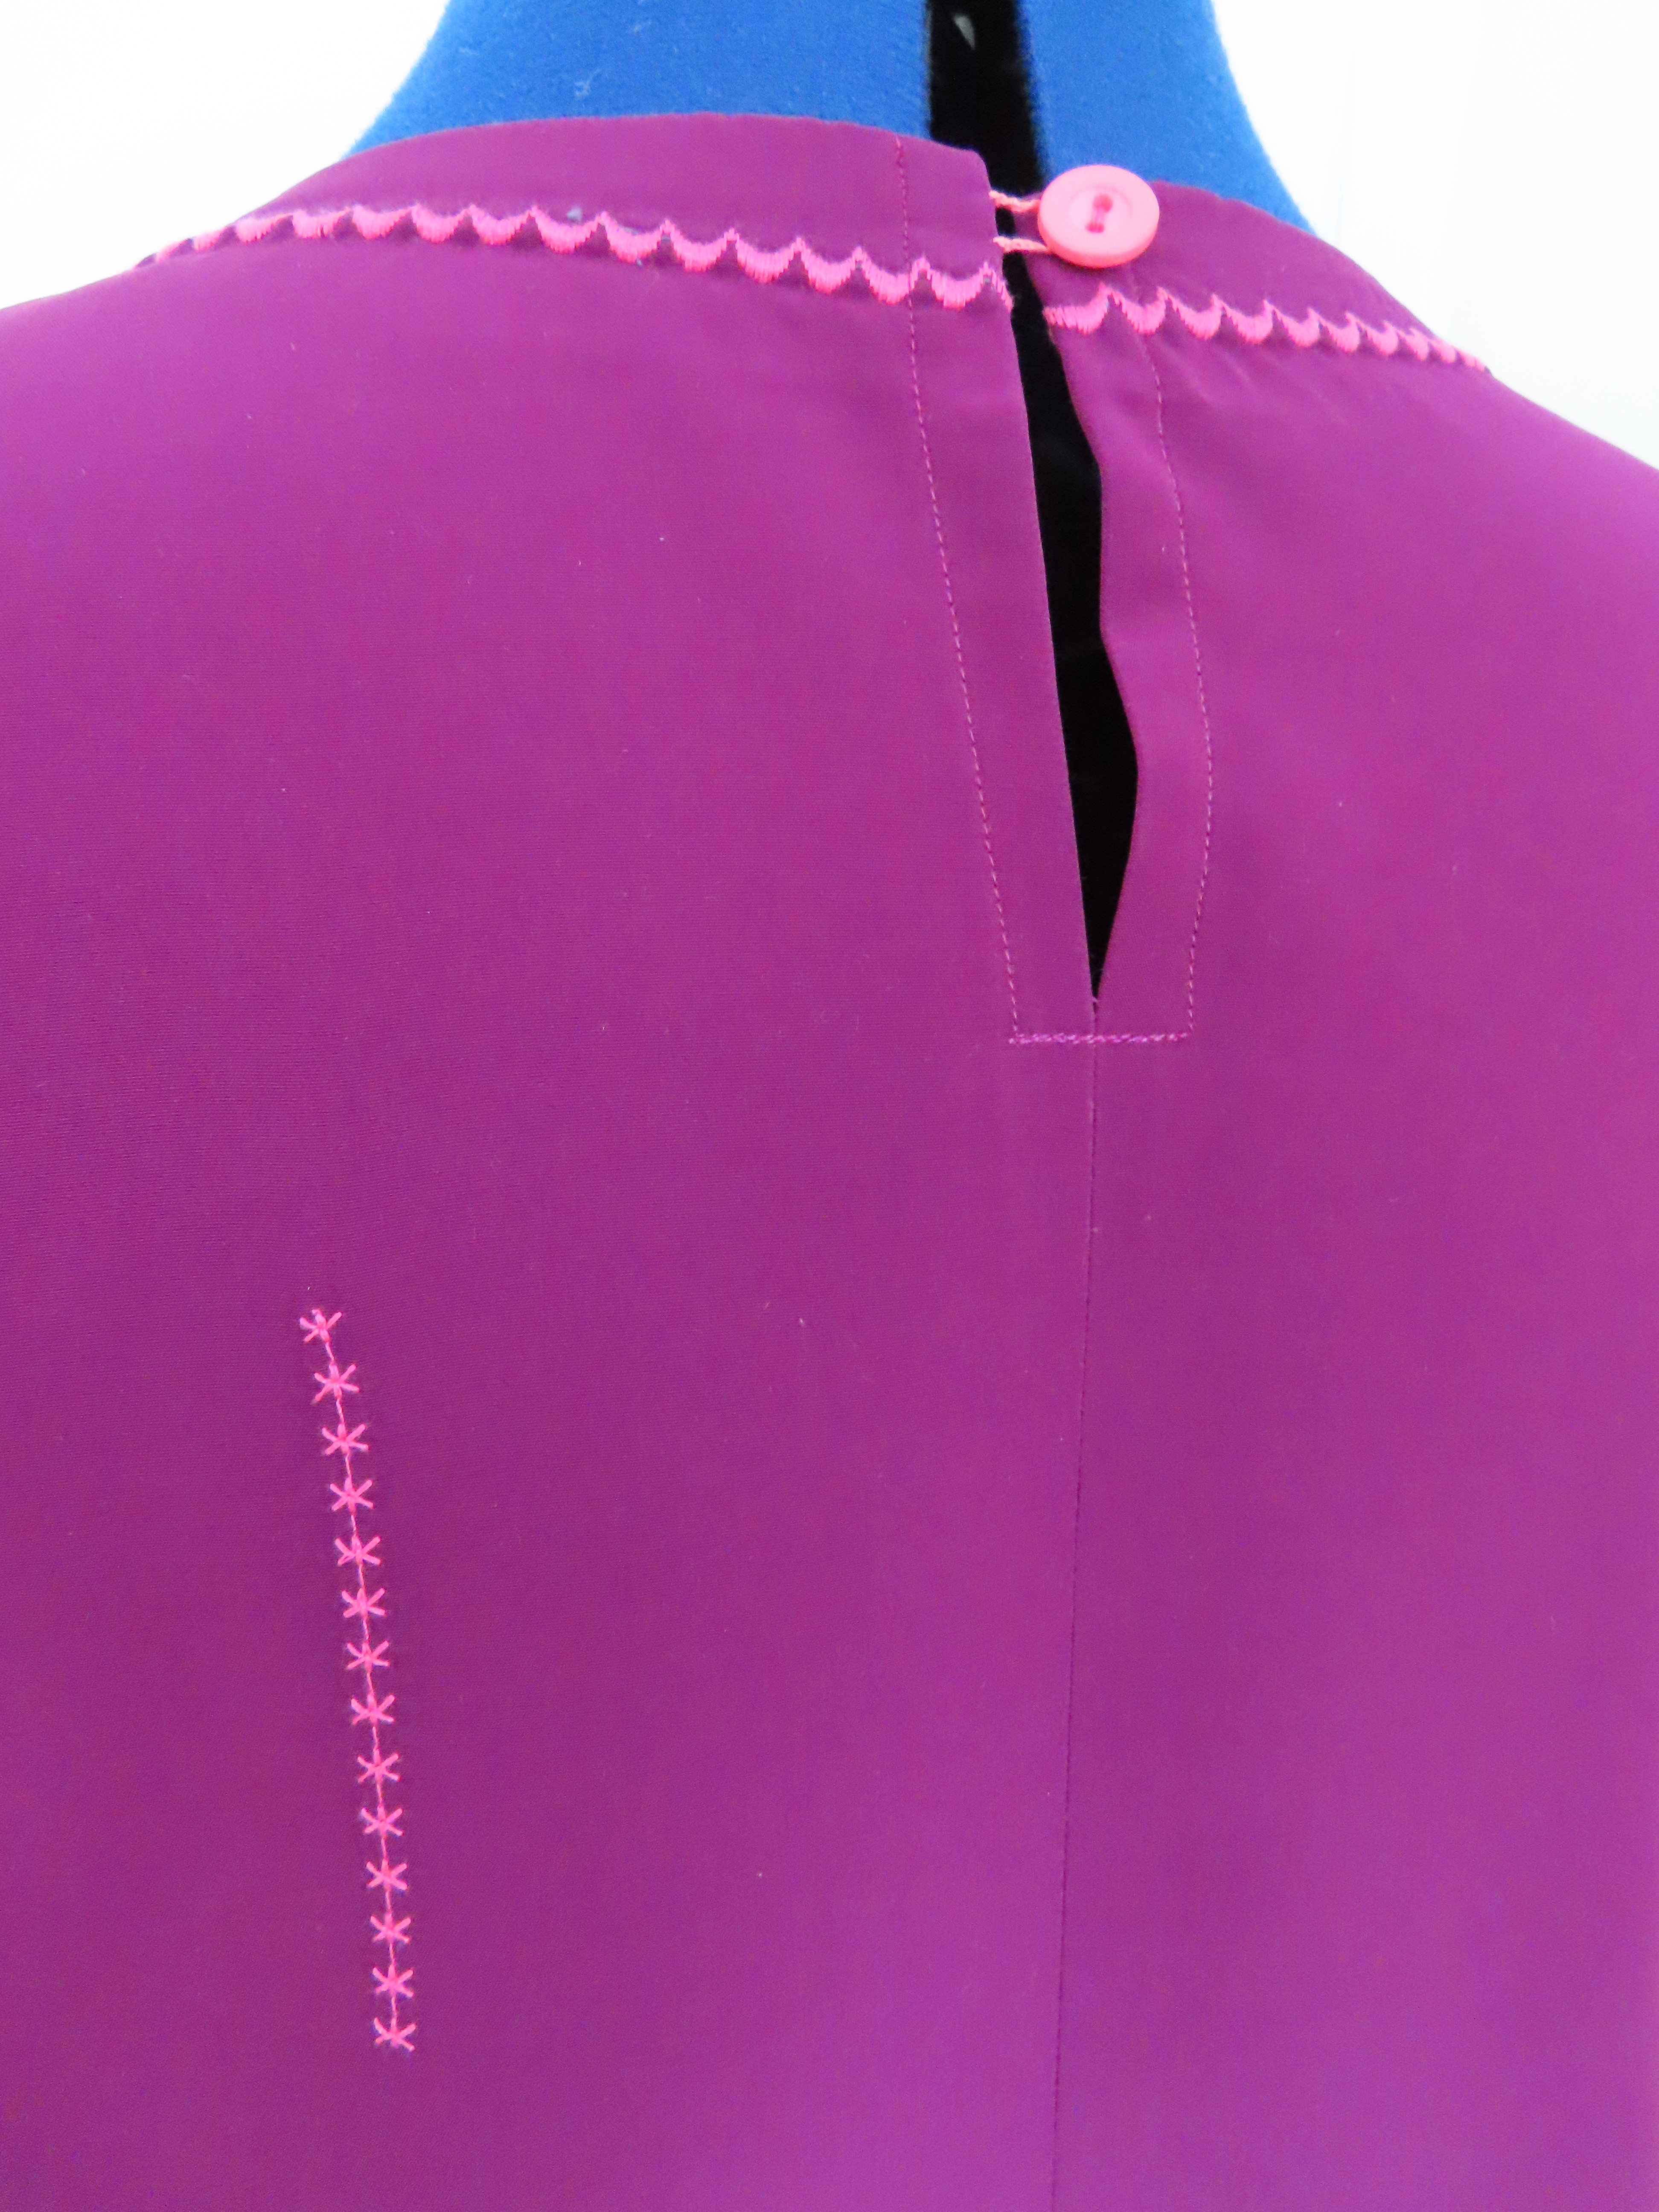
Test, test, test… although if you regularly read my blog, you will know that that is one of my mottos. I already knew that i should back the embroidery with some stabilising interfacing, especially if i was going to stitch round corners and across a variety of grains. This is essential. And the neckline stitching is through the neck binding as well, so more testing needed. I also had to stitch the neck embroidery ‘back to front’, in order to get the scallops facing down the garment i.e. with the fabric to my right, not left as would be normal.
So, careful thinking and planning resulted in a nice neckline decoration at the first attempt.

But the sleeves! I dived in, thinking they would be easier. I will share my lessons learnt:
- First stitch the sleeve seams.
- Second, finish the hem.
- Third, sew the decoration.
- Four, sew the button holes and buttons.
This is not how i started out! Luckily (in a way) there are very few patterns where i don’t have to shorten the sleeves between 5 – 6 cm. I am not aware that i have particularly short arms. I have considered this matter a few times, as it is such a common requirement. My arms are not short. But at least it gives me some ‘space’ to play with when decorating sleeves goes wrong! I just cut off 8cm worth of ‘damage’ and started again, in the above order. As with the neckline, the decorative stitching is over interfacing (some of which shows from some angles, but i’ll live with that). The only things i had to amend were the button positions, which i gauged simply by trying on the top and pinning in the right place (and then measuring to level up). The buttons are vintage, bought at a sewing fair quite a while ago. The ‘magic’ button box keeps delivering.

I had intended to decorate the bottom of the blouse, but considering that the fabric is all about the drape, and that adding interfacing would stiffen the drape, it seemed like a bad idea in the end. But not content with just scallops, i added some vertical lines of stars. These were positioned unevenly, by drawing whilst the blouse was on the tailor’s dummy, and then making sure that approximately equal length lines followed the straight grain. Stitch, and press well. No interfacing this time. Done!
There’s still something weird about the arm syce of this pattern, but you get used to it with wear. and it doesn’t prohibit movement. The fabric is turning out to be surprisingly warm (although not warm enough for general wear just yet), and the sleeves don’t flap about when washing up, which they would have done if i had not had to shorten them.
However, i think this pattern has run its course with me. Plain, but interesting has its use in a wardrobe, and i’ve ‘played’ with machine embroidery, which i may well try again, but on a different pattern.
One Week, One Pattern

Me Made May 2016

Me Made May 2015

Simplicity Competition

Sew Over it Patterns

